Web hosting is quite necessary function to the people who publish their website on the Internet. After finding your domain name and selecting the type of hosting, you need to upload your website on the web host’s server. You can use web hosting either by an FTP application or by cPanel. The website control panel and File Manager tool is commonly used.
There are several steps to upload your website onto the web host. If you don’t want to hire a technical person to do the task, you can just follow the steps to upload your website on your own. The steps for both FTP and cPanel are described here.
Uploading Website with FTP
The steps for uploading your website onto the web host via FTP are very easy steps to follow.
Step 1
Firstly, download a free FTP application and install it. There are several free FTP applications you can download like, FileZilla, Core FTP, and SmartFTP. You can download and install any one of them. In this article the screenshots are specifically for FileZilla. But the steps are also applicable for the other two since the features are same.
Step 2
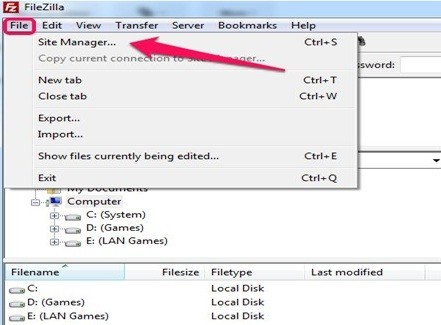
After installing, open the application. On the menu bar, go to “File” and select “Site Manager”.
Step 3
After selecting the “Site Manager,” you will get a pop-up window. From here, click on “New Site” and name your new profile here.
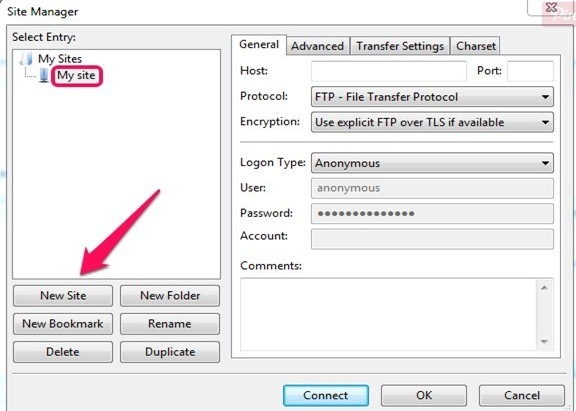
If you don’t provide your own name, the application will automatically provide a name for your site. You should come up with your own name so you can easily recognize it.
Step 4
Enter the host name and the port number of your server. In the drop-down menu of “Logon Type,” select “Normal” and provide your username and password. Then just click on “Connect” to connect your web server.
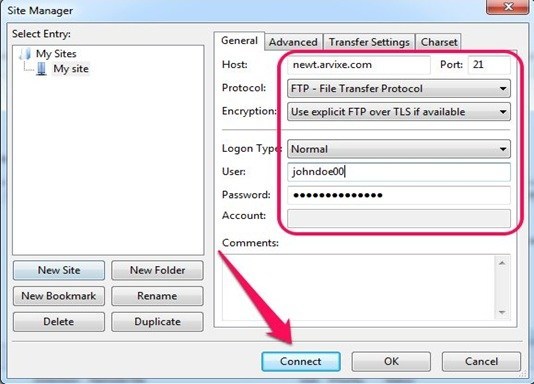
You will get the login credentials, host name, and the port number of your server by an email. The email containing this information is sent by your chosen web host after signing up for your hosting account.
Step 5
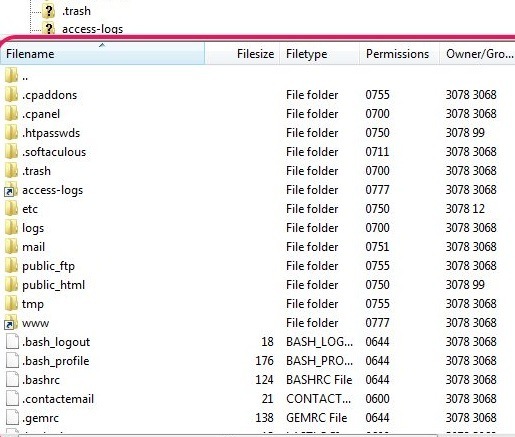
In the right-hand pane, use the File Browser for locating the directory on the web server. This determines the location where you want to upload your files.
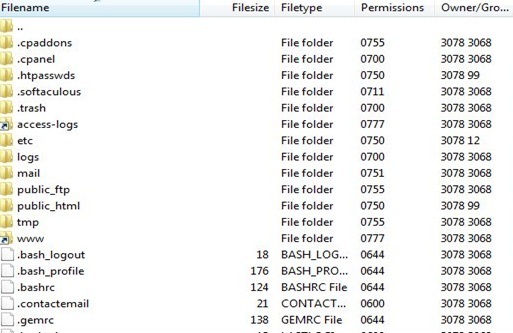
The important tip here is, if you double-click on the www shortcut, it automatically takes you to the root of the Web server’s public folder. If you want to host any single site on your own account, you should upload your site here.
Step 6
Find the folders or files you are going to upload using the “File Browser”. You can navigate your computer folders from left-hand pane.
Step 7
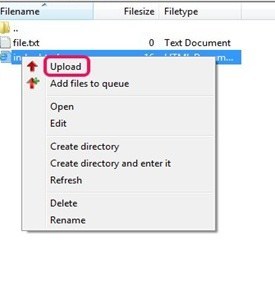
Just right-click on the folder to upload. Then select “Upload.” You can upload multiple files by mouse or by pressing “Ctrl” on your keyboard and clicking on multiple files.
Run a test on your website after uploading all the files. Check the display and the contents to see if they are running properly or not. If all are displaying ok, then the process is finished for uploading by FTP.
Uploading With cPanel
If the web host is installed in an alternate web hosting control panel rather than cPanel, find out whether an uploading tool is available.
Certain hosts like “GoDaddy” apply its custom skin for to the cPanel. If so, your icon for cPanel may differ from the illustrations specified here. Otherwise, the uploading steps for cPanel are provided here.
Step 1
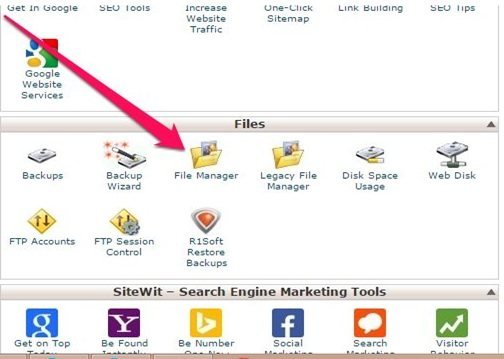
First, log in to your cPanel and click the “File Manager” icon in the category of “Files”. If you forget the details of your cPanel URL or login information, just email your web host after purchasing the web hosting package.
Step 2
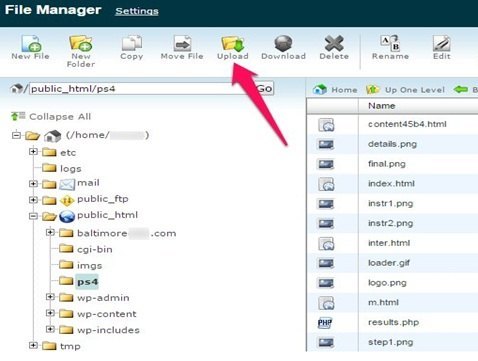
Select “Web Root” and click the “Go” button. If your server is for multiple websites, select the appropriate document root form the drop-down menu for the website files you want to upload.

Step 3
For a new window, click on the “Upload” icon.
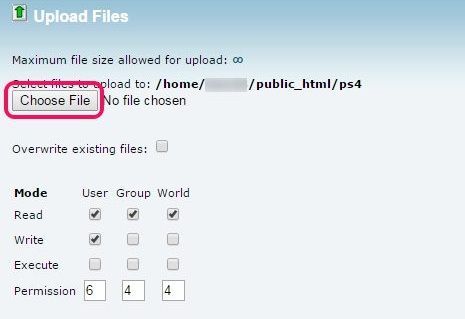
Step 4
Click on the “Choose File” button and select the first file you want to upload. After selecting, cPanel will automatically upload it to your own server. Repeat this process for each file. The important tip here is to check the box for “Overwriting Existing Files” to make sure that the cPanel overwrites any existing files, otherwise you might get an error message.
By following these steps you can very easily upload your website on the web host. Try it yourself and enjoy your website.
Author Bio: Evie Coles is the author of this blog and she has written it to educate her readers about free web hosting. She has specified the steps to upload via FTP or cPanel. While writing this blog, she has found Derek’s review of iPage as a trustable source for web hosting.