About Xcode: It is also called an IDE means Xcode is an Integrated Development Environment. This is one of the best developing application for all developers who wants to build a software applications in iOS platform. Xcode helps you to write the software code, run and debug the code.
Simply Xcode is a SDK(Software Development Kit) which contains a set of software development tools. Xcode is a finest testing application and also an interface which is very useful for the developers. Xcode is designed by Apple and it is specially designed for developing softwares on Mac OS X and iOS. Except in Mac OS X and iOSXcode will not available in any other operating systems.
If you want to make any apps for iPhone you can easily do to that using iOS SDK by using Xcode and then you can transfer it to App store. But to do all this process you need to have an Apple hardware with OSx. To develop app then you guys need to know process of installing Xcode on Windows.
How to Install Xcode on Windows 10, 8 and 8.1
Here we are going to explain about how to install the Xcode in Windows. People who are interested to develop an apps can also now develop apps in Windows using Xcode. But before installation you need have some important things like…
- A computer that runs windows
- Intel hardware virtualization.
- At least 4GB RAM and 10GB HDD.
- And also VMWare 9.0, xcode setup.
And also you need to download Xcode. You can directly download the Xcodefrom Apple site here: https://developer.apple.com/xcode/ide/. But You need to have Apple ID in order to download Xcodedirectly from Apple store.

If you don’t have any Apple Id follow the below steps.For that firstly you need a Working Mac OS X virtual machine on VMware or VirtualBox.
Step by step procedure for Installing Xcode on Windows
Step 1: Firstly we are explaining the process of istallingXcode with VMware. For that you guys need to install the Mac OS X on windows 10, 8, 8.1 and ios using a virtualization program called VMware.
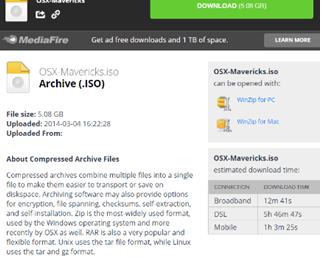
Step 2: For Mac OS X search on google and download OSX.Mavericks.ios as shown below.
Step 3: After completion of downloading the Maverick ios that is (OS X).
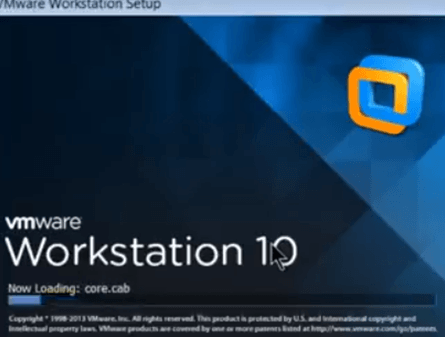
Step 4: Now download VMware as shown below and run the file.

Step 5: Now Open the OS X file then you can get as shown below
Step 6: After that Install VMware. For that click on download vmware file then you will file setup file (VMware workstation).
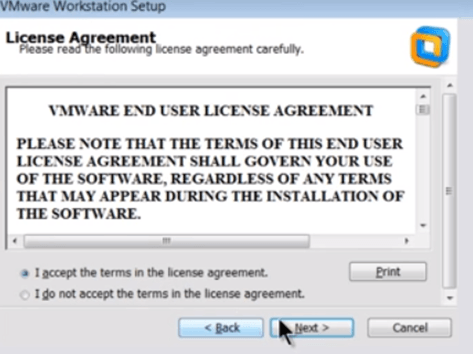
Step 7: Install that VMware click next -> next -> and finally agree the terms and conditions as shown below.
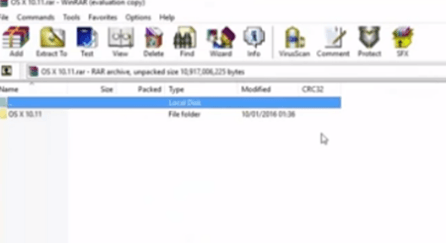
Step 8: After finishing the installation of vmware now, Goto-> my computer and select OS X Mavericks Zip file and unzip the file folder.
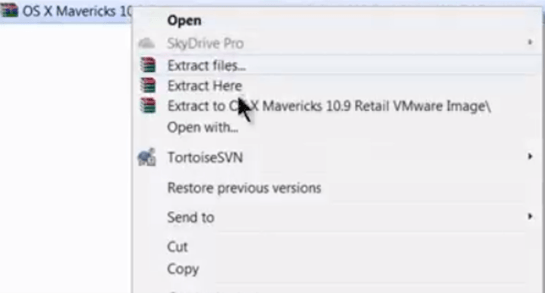
Step 9: Extract the file and copy it on the desktop.
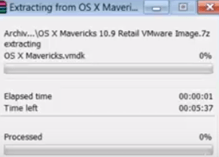
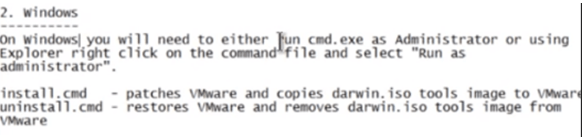
Step 10: After completion of extracting the file double click on Maverick there you can find a folder with name OS X open that file and open read me notepad..
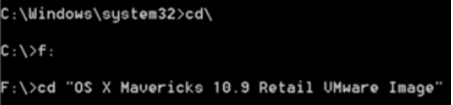
Step 11: Now Goto command prompt and type command cd\. This is for to set the path which means change directory…after that OS X will be on the drive which you want for example I need this to be saved on F drive. So, do as below…
Step 12: Now GOTO ->f drive andClick on power on this virtual machineas below.

Then you will get some dialogue boxes. Click next-> next ->At last click I accept it button.
Then you will get a Page with Apple Symbol like below.
![]()
Step 13: At this stage you need select the country after selecting that click continue button. Then you will get like below.
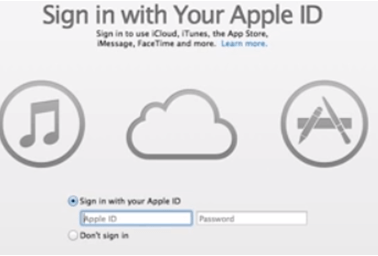
Step 14: Here you need create an Apple id as we discussed earlier.

Step 15: To create an id you need to fill your details there…
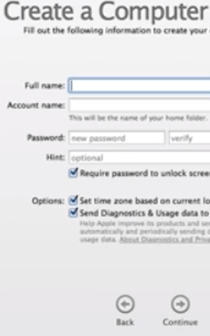
Step 16: After filling the form and continue it asks you to register your mac there click on radio button don’t register. Then you will get like this..

Step 17: After that you will get same as below…With this the major part of installation has been completed. A shown below after following all these steps you will get that 2 windows means you will get an Application interface(Apple interface).
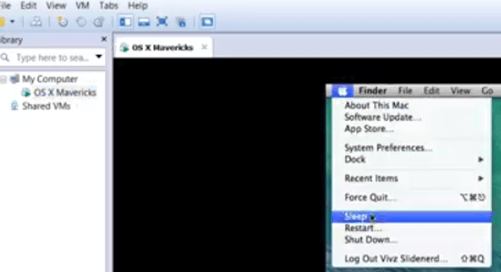
Step 18: Now Goto OS X and click on Shutdown button in Apple.
Step 19: After that Goto Mycomputer in Maverick and click on Shared VMs…thenGoto settings button.
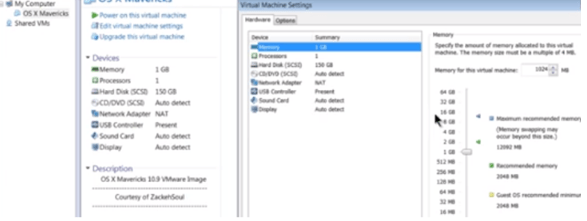
Step 20: Here you need follow some setting as shown below.
Set Memory to 8GB, Number of processor: 2, 2 total 4.
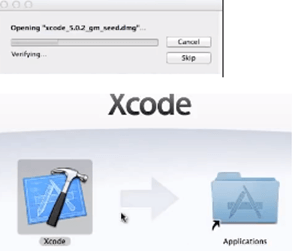
After checking every option now click ok button. Then we will get aOS X_seed.dmg. Copy that OS X_seed.dmg file and paste that file OS X maverick(that is on f drive). Now double click on xcode_os x-seed.dmg it will open like below.
Step 21: After completion of transferring you will get Applications like below.
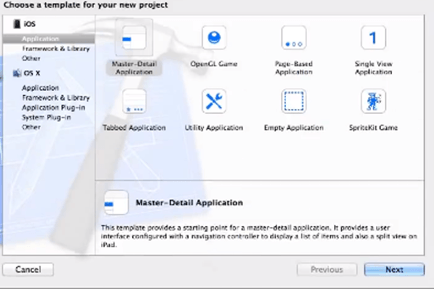
Step 22: After installing all components. It will asks you to start a new project.

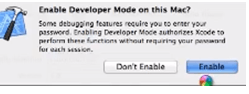
Step 23: After completion of all settings…Enable developer mode as shown below.
Like this you can build you own apps using XCODE on windows 10, 8, 8.1 and ios…Now create a new project and build a test app.
Above we just gave a description about How to install xcode on windows 8, 8.0 and 10 using VMware.
If you want to do this from Virtual box then you need to follow few steps like first you need to have VirtualBox on your Windows computer instead of VMware.
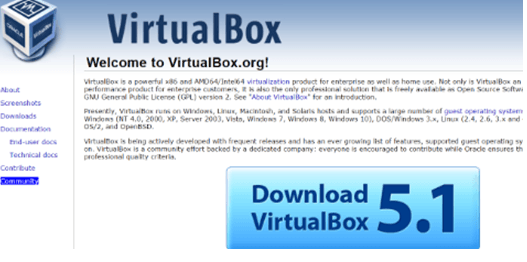
As shown above download and install OSX Mavericks ISO as a virtual machine.After that create a virtual machine on your virtual box. Search that in google for clear explanation. After installing open the Virtual box and click on New button.After that you you will get a new window asking for the name of the new OS there you have enter name of OS as OSX also you guys need to mention the Mac OS X version and then click on next button. After few steps you will get Apple App store. There you need to sign in with your id. After completion of all this process search XCODE in the search box then you will get the apps there.
Like this you need to install xcode on windows. We think this guide would be useful, for more info you can visit techiestate. Here we tend to show you the way to put in Xcode five on Windows seven or Windows 8, 8.1 with virtualized latest Mavericks OS X.